Tuesday 30 April 2013

Connecting With Your Kids


Having two boys leaves me with a house full of cars, dinosaurs, lots of washing and a need for me to join in with their boy games!

What happens when they grow up that little bit, when your not so little one is now five and his interests are all about computer games. The things you once connected with are gone and now they look at you wanting for you to play their new favourite games with their rules. You are left feeling completely confused and have no desire to broom like a car or smash around the house like you are part of Mario Carts and Bowser has just taken over Luigi.

Is this all starting to sound like a second language...Believe me somedays I feel so far apart from my sons world that I have no idea how to merge back into his lane!

Today I took the plunge. I decided to get a connection with my son even if it meant that I had to sit down and play Mario on the wii (something I wouldn't normally do as it hurts my head). 

He was so excited that I said yes to playing that he could barely sit still. He talked the whole time, encouraging me when I fell of the track, letting me know what position I was in and alerting me to the fact that I has special powers that needed to be used now - Push the button MUM!!!


After two tournaments he kindly set me free and said that he is happy to play by himself now.

Giving him that 20mins of my full attention really wasn't that hard. That 20 minutes that made us have something in common. That 20 minutes showed him that I am there when he needs, that I am interested in what he loves and that I support his love for his game! 

The smile on his face when he looked at me confirmed that my desire to connect had been achieved...


Sunday 28 April 2013

The Aftermath Of Glandular Fever Five Years Later


My story starts when my eldest was 6 months old - five years ago. 

I was hit with a two week long stretch of sever headaches and extreme triedness. Tiedness like I have never experienced, to the point of falling asleep upright. I remember saying to my partner one night, if something happens to me make sure my son remembers me. A little drastic I know but at the time I knew something was wrong. Off to the doctor I went and after a few blood tests later I was diagnosed with mononucleosis (Glandular Fever). Great news that I wasn't dying... The down side was that I couldn't do anything to make it go away. For about another month I suffered from the extreme tiredness and weakness of my body, some days it was so hard to even move. My limbs feeling like I had just been swimming for hours, so tired and heavy that moving them was something I had to plan in my head for minutes before hand.

Finally it had passed and here I was thinking it was all behind me...How wrong was I! 

Every few months I would get that feeling, not to the severity of the first time but enough to hit me for a six. The tiredness comes back, the hint to slow down forces me to rest. The frustration set in that yet again I am not me, I am grumpy, tired, and lack any ambition to do anything. 

The years have gone on and my next biggest bout hit just before I fell pregnant with my youngest three years later! Sure enough the two week headache hit and the signs were all to similar. This time I felt it in my throat. It would come on at night and last until morning. The only thing that would take away my sore throat was a morning coffee. I couldn't even talk until I had finished it. So back to the doctor I went. At first I was treated for tonsillitis but the medication made no difference. After blood tests all they could tell me was that mononucleosis was present but showing up that I had had it a few months prior to my symptoms. This is always the case now. It shows up in my system under the name of Epstein Barr Virus, its just lying there waiting to strike me when my immune system gets low or when I get stressed. Again I was left lifeless for weeks with my wonderful partner holding the house up.

Five years on and I am still having bouts. Im left wondering when it will leave my system, wondering what else I can do to prevent it from taking my body over. I am yet to find an answer. It is like nothing I have experienced and I find it very hard to explain the effect that it has on my body. I can only hope that one day it will pass...


The main reason for me sharing this is that a few years ago I was that person trawling the net for answers. I was that person wanting to hear other people's stories. I wanted to know what it was like for them, how they over come it...I really just wanted to hear that others like me were dealing with this virus and that there is an end...One day I will be able to say YES it does end!

My Perfectly Messy :)

Climbing Critters


Simple to make and lots of fun to play with...Its Climbing Critters time!


First thing you will need is your critters. I use a fantastic site called Open Clipart. Here is the link to the bee I used. I click on the PNG button then drag the picture onto my desktop (I use a Mac) Its as easy as that! I then placed the three pictures onto one piece of paper in word, printed, laminated and cut them out.


Now gather your materials, you will need a piece of thread for each critter about 1m long. I used wool for ours. Two 3cm pieces of drinking straws per critter, a coin per critter and a couple of beads or matchsticks.


Stick the coin to the bottom of the critter, this will give him a bit of weight to slide down the thread. Stick the straws as shown to the back of your critters.


Now thread your wool up through the first straw and back down the second straw. To secure the ends add a bead or a match stick to prevent the wool from falling through the straws. 


Your climbing critter is ready to try. We used a door handle to hang them off. To make them climb pull the ends of the wool apart, once at the top let go of the wool and they will slide back down.


Have fun creating your Perfectly Messy climbing critters!


Thursday 25 April 2013

Paper Aeroplane With A Twist


Can you make a paper aeroplane with straws? You sure can!

It may not technically be called a paper aeroplane with the addition of straws but it sure fly's like one and is super easy to make...


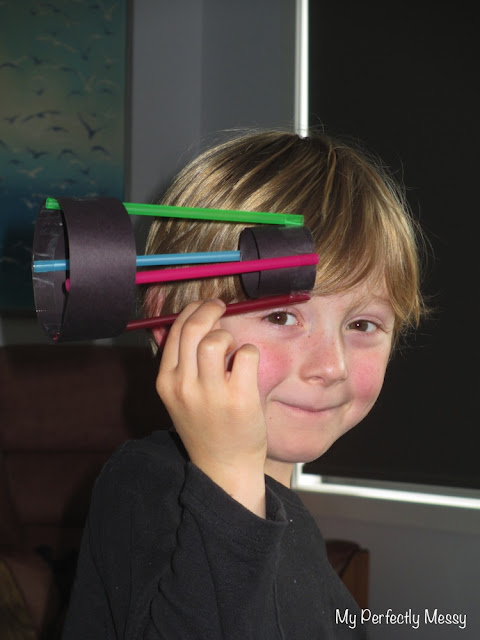
 Cut two strips of cardboard the first one 24cm and the second one 12cm with the width of 2cm for both.


Join the ends of both strips together with sicky tape to make a loop.


Grab 4 straws and cut the bendy ends off. You could save the ends for another craft activity.


Tape the straws on the inside of the large loop. Tape the other end of the straws on the outside of the smaller loop. Now add the other two straws in between the first two.


Your straw paper aeroplane is now complete!


Time to hand it over to a 5 year old to test it out....


Look Mum it can fly, it sure can!


A simple easy activity that will have everyone entertained!


Wednesday 24 April 2013

Baking Soda And Vinegar Wizard's Brew


A rainy afternoon of colourful, bubbly explosions is just what we needed today. 


Time to whip up some Wizard's Brew!


Fill some cups half way with white vinegar and add a few drops of food colouring. Sprinkle in some glitter to add the magic and a good squirt of dish washing up liquid. (This helps to add extra bubbly fun)!


Time to give it all a good stir with a metal spoon...Now the super fun part. Add a heaped teaspoon of baking soda into your cup and watch what happens! 


Our wizard's brew has bubbled and doubled but not quite enough so...


Time to step it up by adding a little bit more baking soda and give it a quick stir...TaDa our wizard's brew is brewing nicely.


The colours are overflowing and the effect is fabulous - Our wizard's brew is complete! Until I had one last idea...


Add a piece of paper towel to soak up the gorgeous colourful, bubbly experiment and turn it into a work of art!


A Perfectly Messy experiment!


Our Mini Holiday In Tassie


A spontanious decision to go on a mini holiday saw us booked and leaving in two days time!

We were up early on Sunday and on the road by 7am. After a few stops for food, coffee and a leg stretch we arrived at the Tasmanian Zoo by lunch time.


The zoo was fantastic and I fell in love with these two gorgeous wombats sleeping together. We also made friends with a sheep-goat and the many monkeys were quick to say hi!


The most anticipated part of the zoo was the Jurassic Swamp and finally it was time for our tour. The wander through the bush lead us to some amazing dinosaurs with lots of sound affects along the way.


Our next stop was to The Tamar Valley Resort where we would be spending the next two nights. The jumping pillow was a big hit with the kiddies and even the Daddy! We played our first game of put put mini golf and found that our 5 year old was a natural doing much better than his Mum. We road around on the coolest go carts and raced like were part of the Mario game - Of course I was Princess Peach. We explored the Launceston Museum and check out the Cataract Gorge in the pouring rain!


We had our first dinner out in years! The boys we so well behaved and what a treat to sit down and be severed on.


Our last day on our trip ended with a beautiful cruise up the river. The first time the boys have been on a boat. We were lucky to have a sunny morning and going up into the gorge was amazing.


Soon it was time to head on our 3 1/2 hour drive home. We timed it perfectly with the kids and they were fast asleep for most of the way. It was a lovely mini holiday with only a few bumps and grazed knees...Oh and one black fingernail after it was jammed in a car door!


Thursday 18 April 2013

Why We Homeschool


This post goes out to everyone who doesn't understand why we homeschool.

We always sort of joked about it even back when our eldest was a baby...I would chuckle along but inside thinking it would never happen - and here we are!

As school age quickly approached the signs of not being physically ready were there. So we decided to hold our eldest back for a year. Within a few months he was showing new signs of wanting to learn everything especially counting. This is how it all began and so did the conversations about school. We know our son like no one else, we know his strengths and his weaknesses. 

What would you do if you knew your son's abundance of energy would label him as the disruptive child? What would you do if you knew his peers would laugh at his melt downs? What would you do if your knew his clever mind would go unnoticed?

Would you send him to school knowing his intelligence would be overlooked due to his high energy level? Would you send him to school knowing that he craves one on one attention? Would you send him to school knowing that his uniqueness would be beaten down by the school bully?

We couldn't and we wouldn't!!!

We wanted to give him a safe, loving learning environment where he isn't judged for his high emotions. A place where he can learn at his own pace, jump miles ahead then have a break and let his body catch up. A place to transform into any character and work through his high energy without be told to sit down. A place where he can be him without any judgment!

I have never made it a secret that we homeschool. In fact I am very proud of what we do, so proud in fact that we started up a website, facebook page and group to help others get into homeschooling. I have publicly put our family out there for everyone to see and judge. Is that easy - No Way!

At times I feel like hiding and not turning on the computer, other times it makes me feel so excited that others are loving what we are doing. Then you have the families that contact you asking for advice and you do your absolute best to support them in their decision when no one else will.

Its ok that some of our friends have disappeared, its ok that they don't have anything in common with us anymore - Its all ok! All because we are exactly where we are meant to be. All together, all happy and all loving our learning journey as a family!


From a Perfectly Messy Mum  xx


Wednesday 17 April 2013

A Handy Way To Use Velcro Dots


I was a very excited Mum when I discovered velcro dots at our local newsagency. I knew it was a craft supply I wanted but didn't quiet know how to put them to good use. So I jump on google and had a look at how others were using them and this is where I found the most fantastic idea! 

Use velcro dots on wooden puzzles so you never lose the pieces again! 

Here is the site where I first came across the idea and below is how I made it work for us!


We all have these cute wooden puzzle lying around at home and for months I would have lost pieces around the house...Well no more!


With the help of some velcro dots our plain wooden puzzle has been transformed into  a funner more exciting toy to play with and best of all no more lost pieces! You can even store it upright without any pieces falling out! 


I added the soft velcro dots to the back of the puzzle piece. I chose to do it this way around so that the velco didn't stick to our carpet or snag delicate material while my little one was playing.


You then add the rough side of the velcro dot to the puzzle board. Now the fun bit...Adding all the pieces and watching your little one be amazed when they try to remove their first puzzle piece that is now stuck with velcro. It will quickly become the new and most favourite toy again!


Have fun exploring with velcro dots!


Tuesday 16 April 2013

Learning How To Sew


I am now a proud owner of a sewing machine and teaching myself how to use it...Now I feel like a homeschooling Mumma!

It may look like I know what im doing but trust me I had no idea and was so nervous to even thread the new machine.... I even burnt my finger on the light! What I have learnt is a sewing mistake can end up a great creation in the end - so hang in there!


This may not look that interesting but this is my first attempt of a bean bag. It was made out of a singlet and an old half empty pack of lentils I found stashed at the back of the cupboard. Two things that would have been thrown away now recreated into a toy - Im going to love sewing! Its a skill I cant wait to master!


Now lets not forget I am an absolute beginner and usually I have a disaster that I then turn into a passable creation.
My next try at sewing was meant to be an aeroplane made out of felt and the filling is red lentils (the only filling I had) but I quickly found out that I had made my plane tail a bit to narrow so the filling didn't work and the tail had a terrible bend in it. So after chopping off the tail this is how my version of a rocket was formed. Its amazing what a few buttons and ribbons can hide and enhance!


Having had a week away from my new toy I was eager to try something else. Earlier that week Papa had given me a few old trousers and shirts so I could practice my sewing. I had in my mind that I would like to make a bag but like most of my sewing plans it quickly changed into something kid related and evolved into a tool belt for the boys. To jazz it up a bit I added a buttoning activity on the front! It was super duper simple to make - an old pair of trousers and a few straight lines sewed, add a ribbon, buttons and some felt shapes and VoilĂ !


The sewing machine in my New Favourite Thing and I hope to make many more unique creations...From many more Perfectly Messy sewing mistakes!


Monday 15 April 2013

How To Make A Spiky Echidna


I have been waiting to blog about this activity for awhile now and finally I can. Please feel free to pin it!


Have you ever had an idea that you just had to bring to life?  


Well with a bit of help from Papa we were able to create my vision - A fun Spiky The Echidna that will help develop Master 5's fine motor skills by using toothpicks to build the echidna's spikes! 

Below are the simple steps to make another Perfectly Messy creation.


To start we found a left over piece of chipboard and I drew a simple echidna shape. No need to be an artist the more simple the shape the better!


This is where I handed it over to Papa and he cut out the shape using his jigsaw. He then added his touch onto the echidna by putting little legs and feet made from screws and washers. (This step isn't necessary but did give our echidna a fun quirkiness)


Time to paint our little friend, my favourite part! I started with a dark brown all over and gradually added lighter browns and finished with a gold to highlight the spikes. Once again I handed it over to Papa to drill the holes for the spikes. I waited nervously hoping that it would work and our echidna survived all the drilling. To my absolute joy he did and looked fantastic!


Now it was time to try out our Spiky The Echidna. Can you add his spikes without being pricked? We are so pleased with our masterpiece! Spiky The Echidna has been very loved in our house!


Have fun creating your Perfectly Messy!


Sunday 14 April 2013

Colouring Salt With Tempera Paint


On one of our trips to the art shop we discovered tempera paint. I had heard of this paint many times while scrolling through art blogs so I thought it was a must have and amazingly very cost effective - Perfect!

So it had sat untouched in my art supplies for a few week now and I decided to get it out and use it to colour salt. I had no idea if it was going to work but thought it would be a great experiment for Master 5.


We purchased the three primary colours - Brilliant Red - Brilliant Blue - and Lemon.


Master 5 was super duper keen to help. I sprinkled some tempera paint onto some salt in a glass and gave him the exciting job of stirring. The colour quickly grabbed hold of the salt and the effect was fantastic!


Time now to pour our coloured salt into our bottles. Using a funnel allowed master 5 to help with ease.


The next colours were done the exact same way.


Here they are all ready to go... Don't they look fantastic!


Its now time to add some glue to a piece of paper, sprinkle some salt, let it dry and have fun shaking it off to see your amazing art work appear!


I hope you have fun creating your Perfectly Messy!